
In a Queens home, drinking water questions often begin with one observation: the water tastes different, a child uses a certain sink every day, a renovation just ended, or the property has a plumbing history that nobody can explain clearly. For Queens homes, renovation work should be approached with structure rather than guesswork. Water that looks normal can still interact with materials inside the building, and water that looks unusual may require testing to identify the actual reason. Professional water testing services help connect everyday concerns to a sampling plan that can be reviewed, documented, and understood.
The reason this matters is that local plumbing details can change the final water profile. In many properties, the story includes new faucets, reconnected supply lines, disturbed sediment, soldered repairs, and older pipes behind new finishes. Those details are not always visible during a walkthrough, and they may not appear in a listing, renovation summary, or casual conversation with a neighbor. Testing gives homeowners, parents, residents, and property managers a better way to ask what is happening at the tap. Instead of assuming the whole property is represented by one quick sample, the plan can match the fixtures and routines that actually matter.
Why Queens water questions need context
Public water information is useful, but it does not answer every household or building question. A utility report can describe the larger system, while a sample from a specific faucet can describe what reaches that faucet after water passes through the property. Residents can review background information from sources such as official drinking water resources while still recognizing the value of site-specific testing. The two ideas work together. Public data gives context; fixture-level sampling gives property-specific detail.
For many Queens homes, the concern is not just whether water is generally supplied to the area. The concern is how that water behaves after contact with building materials, valves, aerators, filters, and rarely used branches. A home or school may contain several small water systems inside one structure. A newer kitchen faucet may not represent an older bathroom. A hallway fountain may not represent a cafeteria sink. That is why a careful plan focuses on use patterns, plumbing history, and sample timing rather than convenience alone.
What a useful test panel may include
A practical testing plan may include lead, copper, iron, turbidity, bacteria, pH, and corrosion-related indicators. These items do not all answer the same question. Lead and copper can help evaluate plumbing-material and corrosion concerns. Bacteria testing can support potability questions when there are odor concerns, low-use fixtures, or unusual building conditions. PFAS may be included when families want a broader view of modern drinking water issues. Iron, turbidity, pH, and hardness can help explain taste, color, staining, or corrosion behavior. The best panel is focused, not random.
For lead-specific questions, residents can review the EPA’s drinking water lead information. When children are part of the concern, the CDC or EPA guidance on lead and drinking water can help families understand why plumbing materials and corrosion deserve attention. These resources do not replace a local sample, but they help explain why a certified laboratory result is more useful than relying on appearance alone. Lead is especially important because it is not reliably identified by taste, smell, or color.
Why sample locations matter
Good testing begins with choosing the right points. In this situation, useful locations may include a newly installed kitchen, bathroom vanity, refrigerator line, and utility sink. The goal is to match samples to real use. A fixture used for drinking and cooking deserves more attention than a sink that is almost never used. A first-draw sample can answer a different question than a flushed sample. A fixture after a filter may tell a different story than the same line before filtration. Sample labels and timing notes make the final report easier to interpret.
This is one reason it helps to hire a water testing company when the concern involves children, older plumbing, multiple fixtures, or a building with unclear history. Professional planning can prevent common mistakes, such as testing the easiest faucet, forgetting how long water sat in the line, or mixing up sample locations. The result should not be a random set of numbers. It should become a map of what was tested, why it was tested, and what the results suggest about the property.
How results become easier to understand
A laboratory report is most useful when it is connected back to the original question. If the issue is taste, metals and corrosion indicators may matter most. If the concern is children’s daily drinking water, the main drinking tap and lead-related indicators may deserve priority. If the property recently had construction, a before-and-after mindset can help. If one fixture is unusual, a comparison sample from another fixture may show whether the issue is local or broader. The result becomes stronger when the testing plan was thoughtful from the start.
Families and owners can also prepare by writing down what they know before testing begins. Helpful notes include the age of the building, recent repairs, fixture replacements, filter use, periods of vacancy, unusual taste or color, and which taps are used most often. These details can be discussed through the site’s water testing FAQ or during scheduling. The more clearly the concern is described, the easier it is to select a panel and sampling sequence that produces practical answers.
Avoiding the one-sample mistake
The biggest mistake in many water investigations is treating one convenient faucet as the whole story. In a Queens home, that shortcut can miss the difference between a renovation-related change or a pre-existing plumbing condition. One outlet can have a newer faucet, another can have older internal parts, and a third can sit unused long enough to create a different sample profile. A good plan does not necessarily require excessive testing, but it should include enough comparison to make the result meaningful. That is especially true when the concern affects children, tenants, students, or daily drinking habits.
For Queens homes, water testing is most valuable when it turns concern into organized information. It helps show what was measured, where it was measured, and why the result matters. Residents can explore local service coverage through the locations page, read related topics on the water testing blog, or contact Water Testing Companies to request a plan built around their property. The right approach is not panic and not dismissal. It is a clear testing strategy that respects the way water is actually used every day.
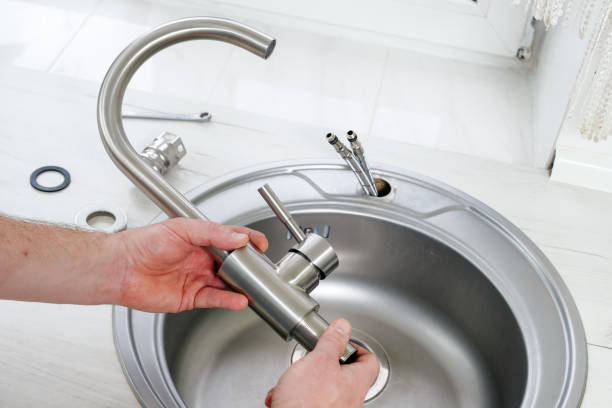
Queens homeowners should keep renovation records close when planning samples. The brand-new fixture is only one part of the water path. Contractors may have disturbed sediment, connected new materials to older lines, changed shutoff valves, or adjusted piping in a way that temporarily changes what comes from the tap. A test taken immediately after work may answer a different question than a test taken after normal use returns. Homeowners can describe what was replaced, what stayed in place, and which fixtures are used most often. That simple history helps the testing plan distinguish between a short-term construction effect and a condition that existed before the project began.
If renovation work was completed in stages, homeowners should also think about timing. A bathroom finished last year and a kitchen completed last week may deserve different attention. Water that sits in new lines, passes through older branches, or flows through a recently installed fixture may show different results. Testing can help the homeowner understand whether the project truly simplified the water story or simply added a new layer to an older plumbing system.